How to Create and Manage a Multi-Language WordPress Website
Published on: 11 March 2026
Last updated on: 30 June 2026
Set up a multi-language WordPress website with translation plugins.
Add language switchers for a seamless user experience.
Follow multilingual SEO best practices to boost global visibility.
A multilingual WordPress website showcases its content in more than one language, helping to reach a global audience. The website translation process can be done manually or automatically using a plugin.
Why You Need a Multilingual WordPress Website
As your website grows, reaching a wider audience becomes crucial. Depending on one demographic may limit your potential, so consider translating your content into other languages for better accessibility.
Providing information in your audience’s local language improves the user experience and gives you a competitive edge. Additionally, tailoring content to specific cultures and regions demonstrates respect and understanding, fostering trust that benefits your brand.
From a search engine optimization (SEO) perspective, a multilingual website has the opportunity to climb search engine rankings and gain visibility in multiple regions. We’ll dive deeper into these benefits later.
How to Make a Multilingual WordPress Site?
Now that you understand the benefits of providing quality translations of your website content, let’s explore two ways to do it ‒ using a plugin and manually.
Many WordPress translation plugins are available, but we’ll focus on three of the most popular: WMPL.
How to make a multilingual WordPress site using the WPML plugin
WPML is the most popular multilingual plugin for WordPress, with over 1,000,000+ active installations. Unlike other plugins, WPML lets you add an unlimited number of languages to your website and includes automatic translation powered by ChatGPT.
Using WPML, you can translate your WordPress website into 65+ languages, add a customizable language switcher, and rank well in other languages by optimizing for multilingual SEO.
Here’s how to use WPML to build a multilingual website.
1. Set up WPML
WPML is a premium plugin, so you need to buy a plan to use it. For most websites, WPML’s most popular plan, Multilingual CMS, should be sufficient. It includes all features and add-ons, and access to support.
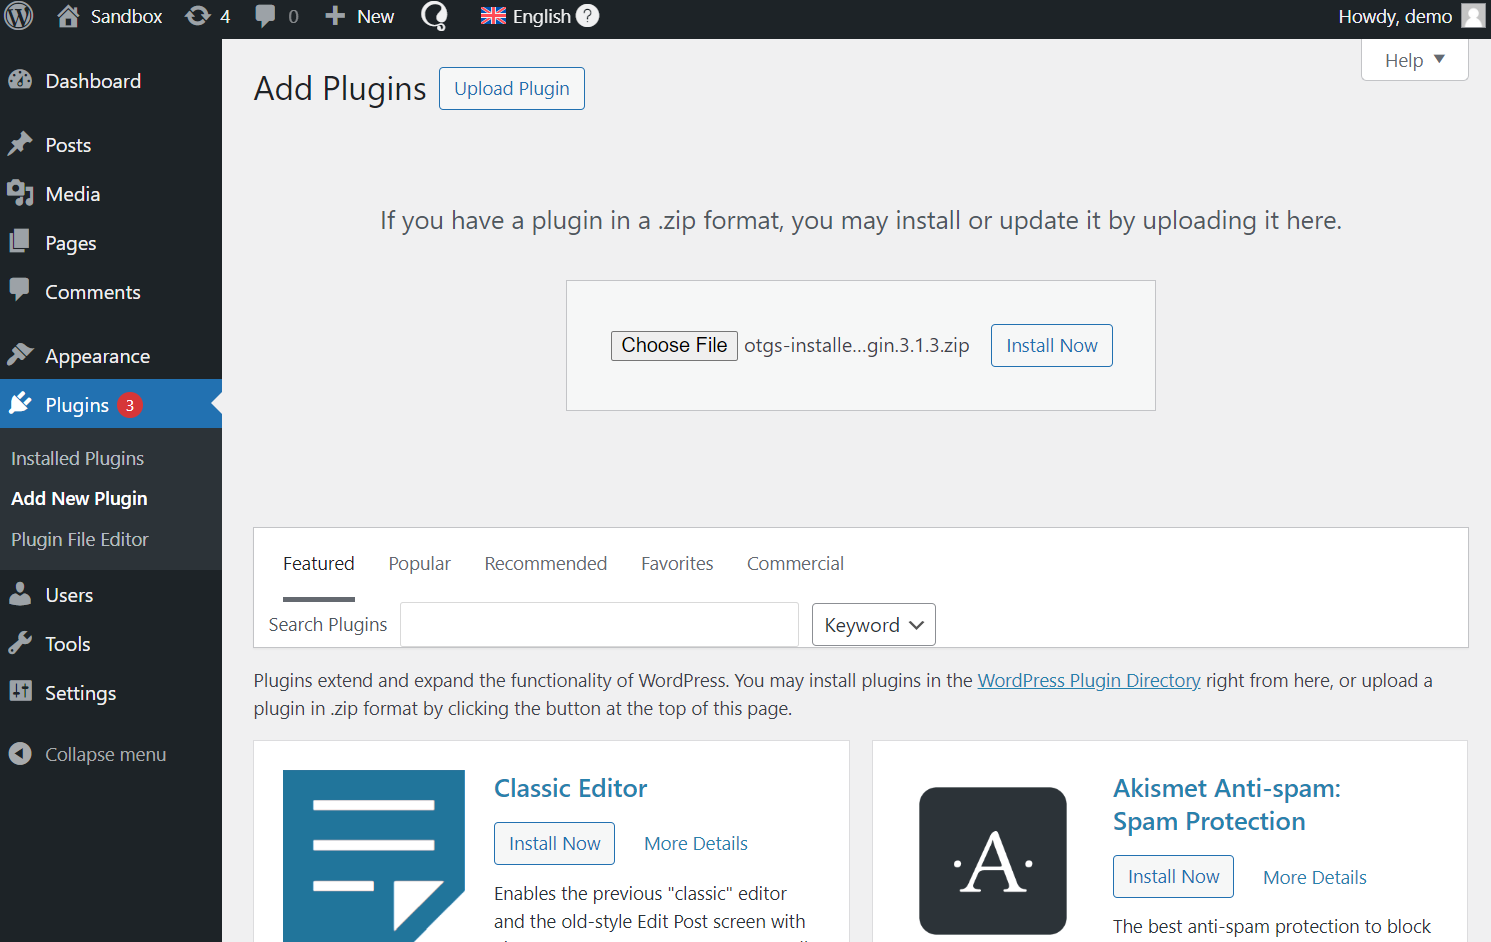
Once you have purchased a WPML plan, go to the Downloads area in your account and download the OTGS Installer, a file containing the WPML plugin and all necessary components.
Next, in your WordPress admin, go to Plugins → Add new and upload the OTGS Installerfile.
Once you activate the plugin, a new menu item called WPML will appear in your WordPress main menu. The last step before you can start using WPML is to configure the plugin on your site.
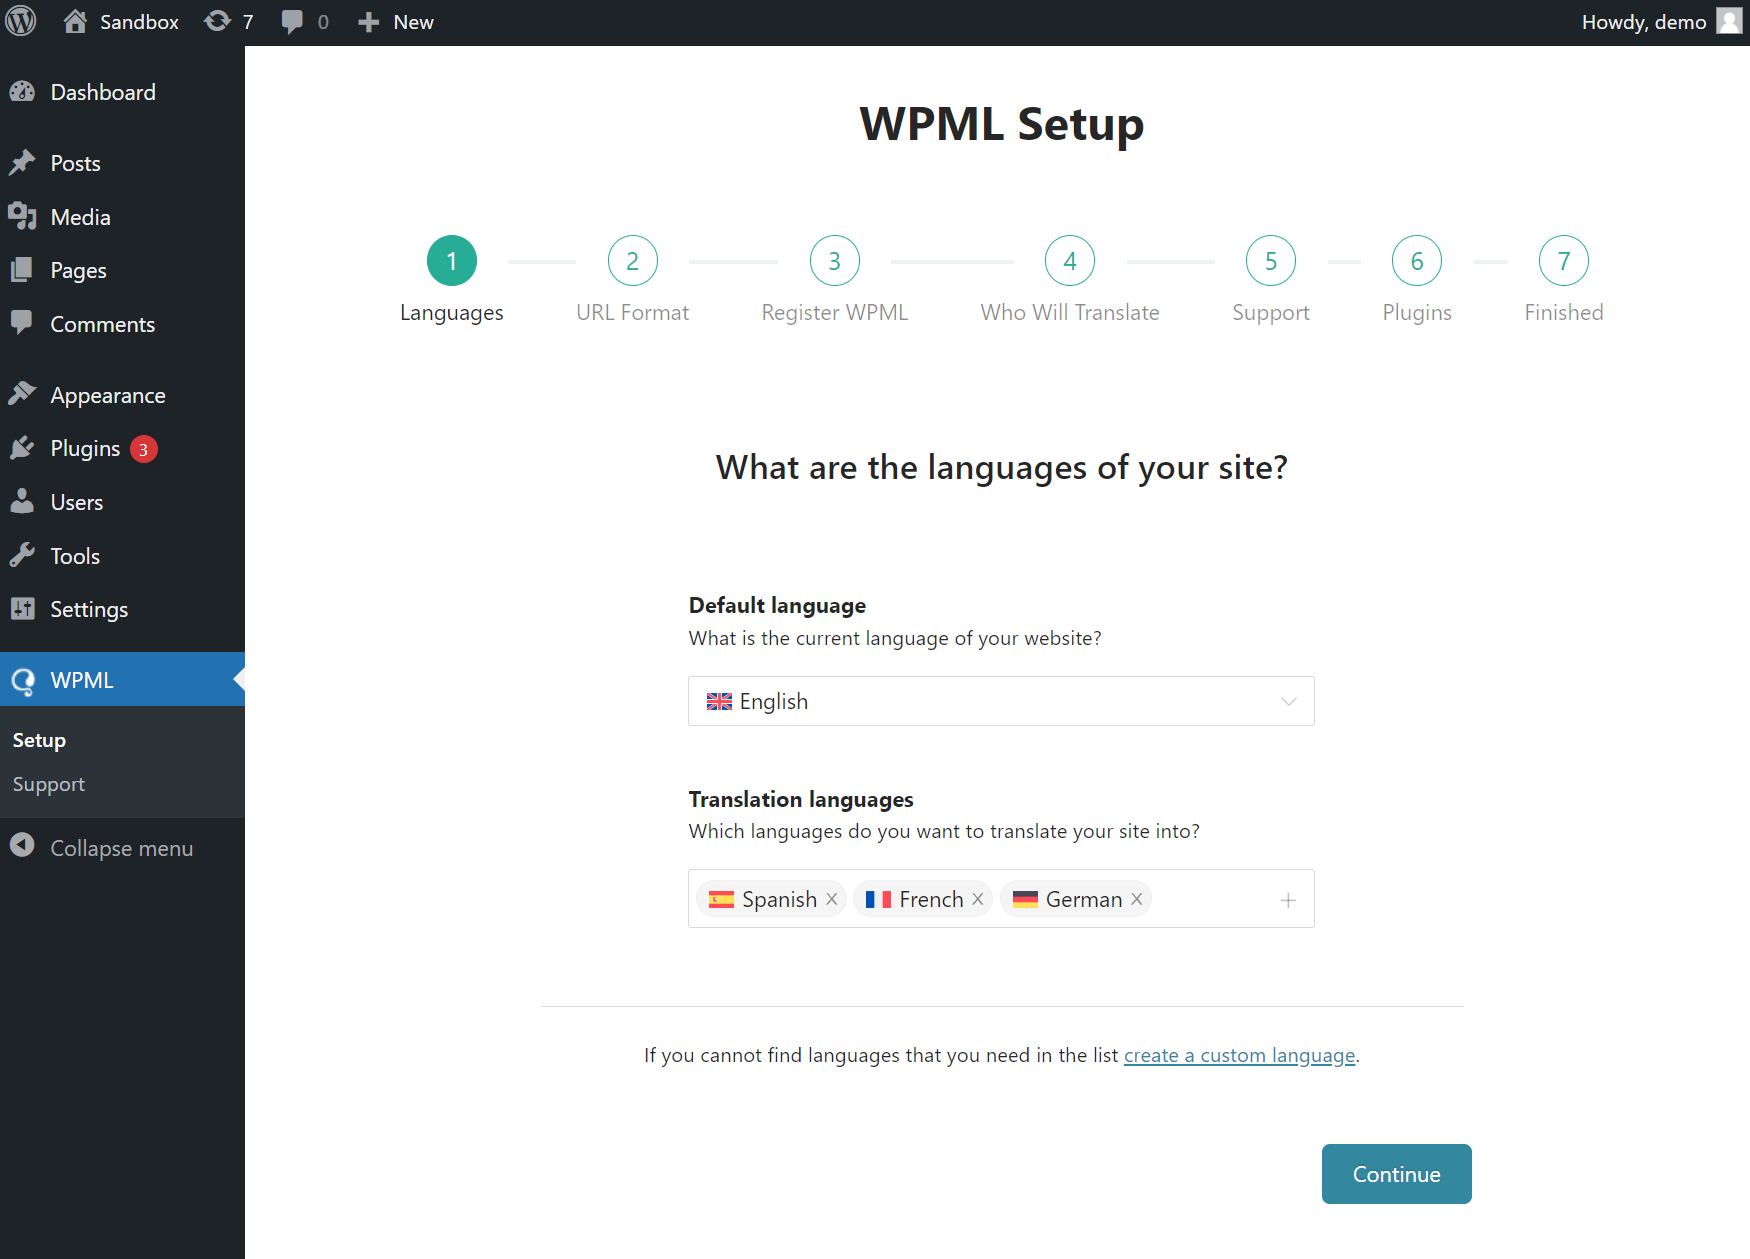
2. Configure WPML on your site
WPML includes a short setup wizard for customizing your preferences. This includes choosing which languages to add, a URL format for translated pages, and the option to add your own team of translators.
To start the setup wizard, go to WPML → Setup.
Once you complete the wizard, you can start translating your site with WPML.
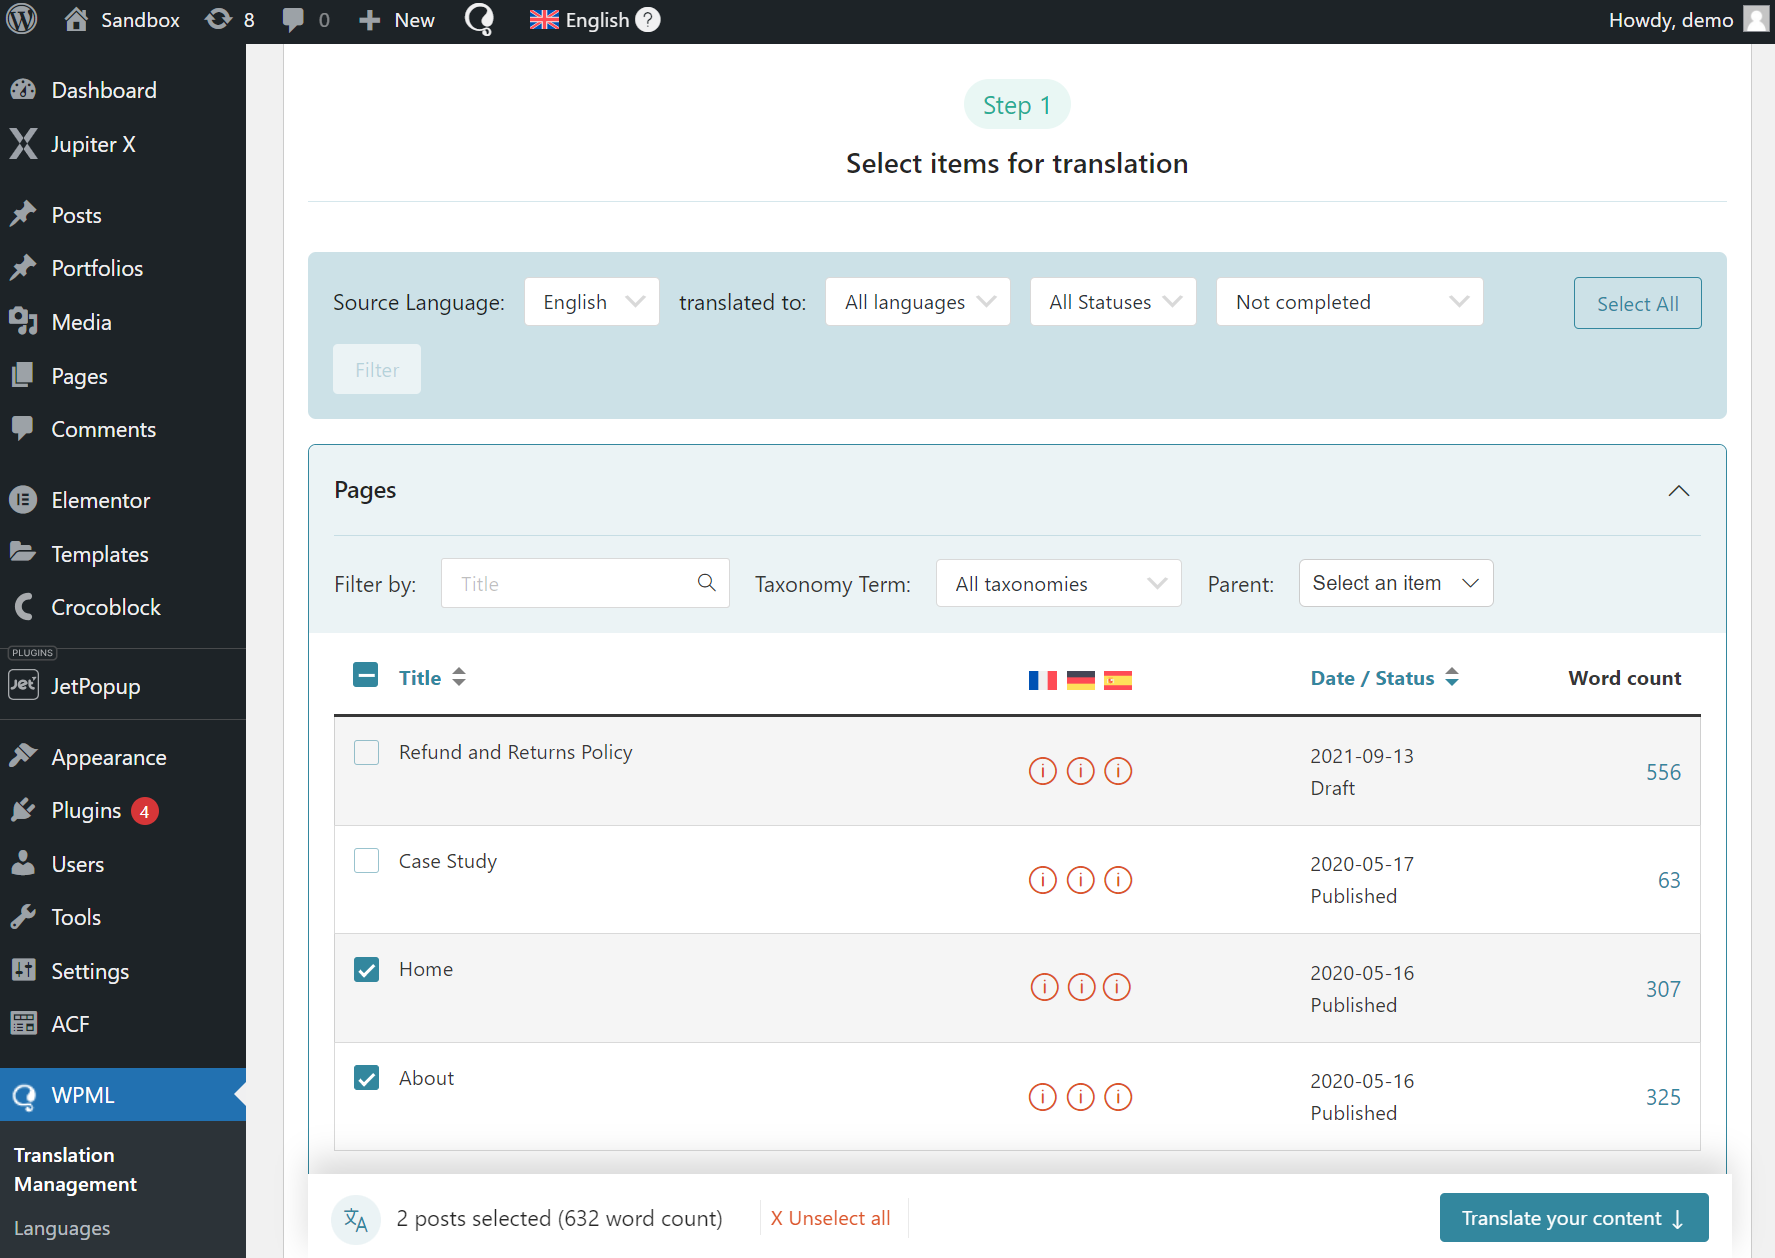
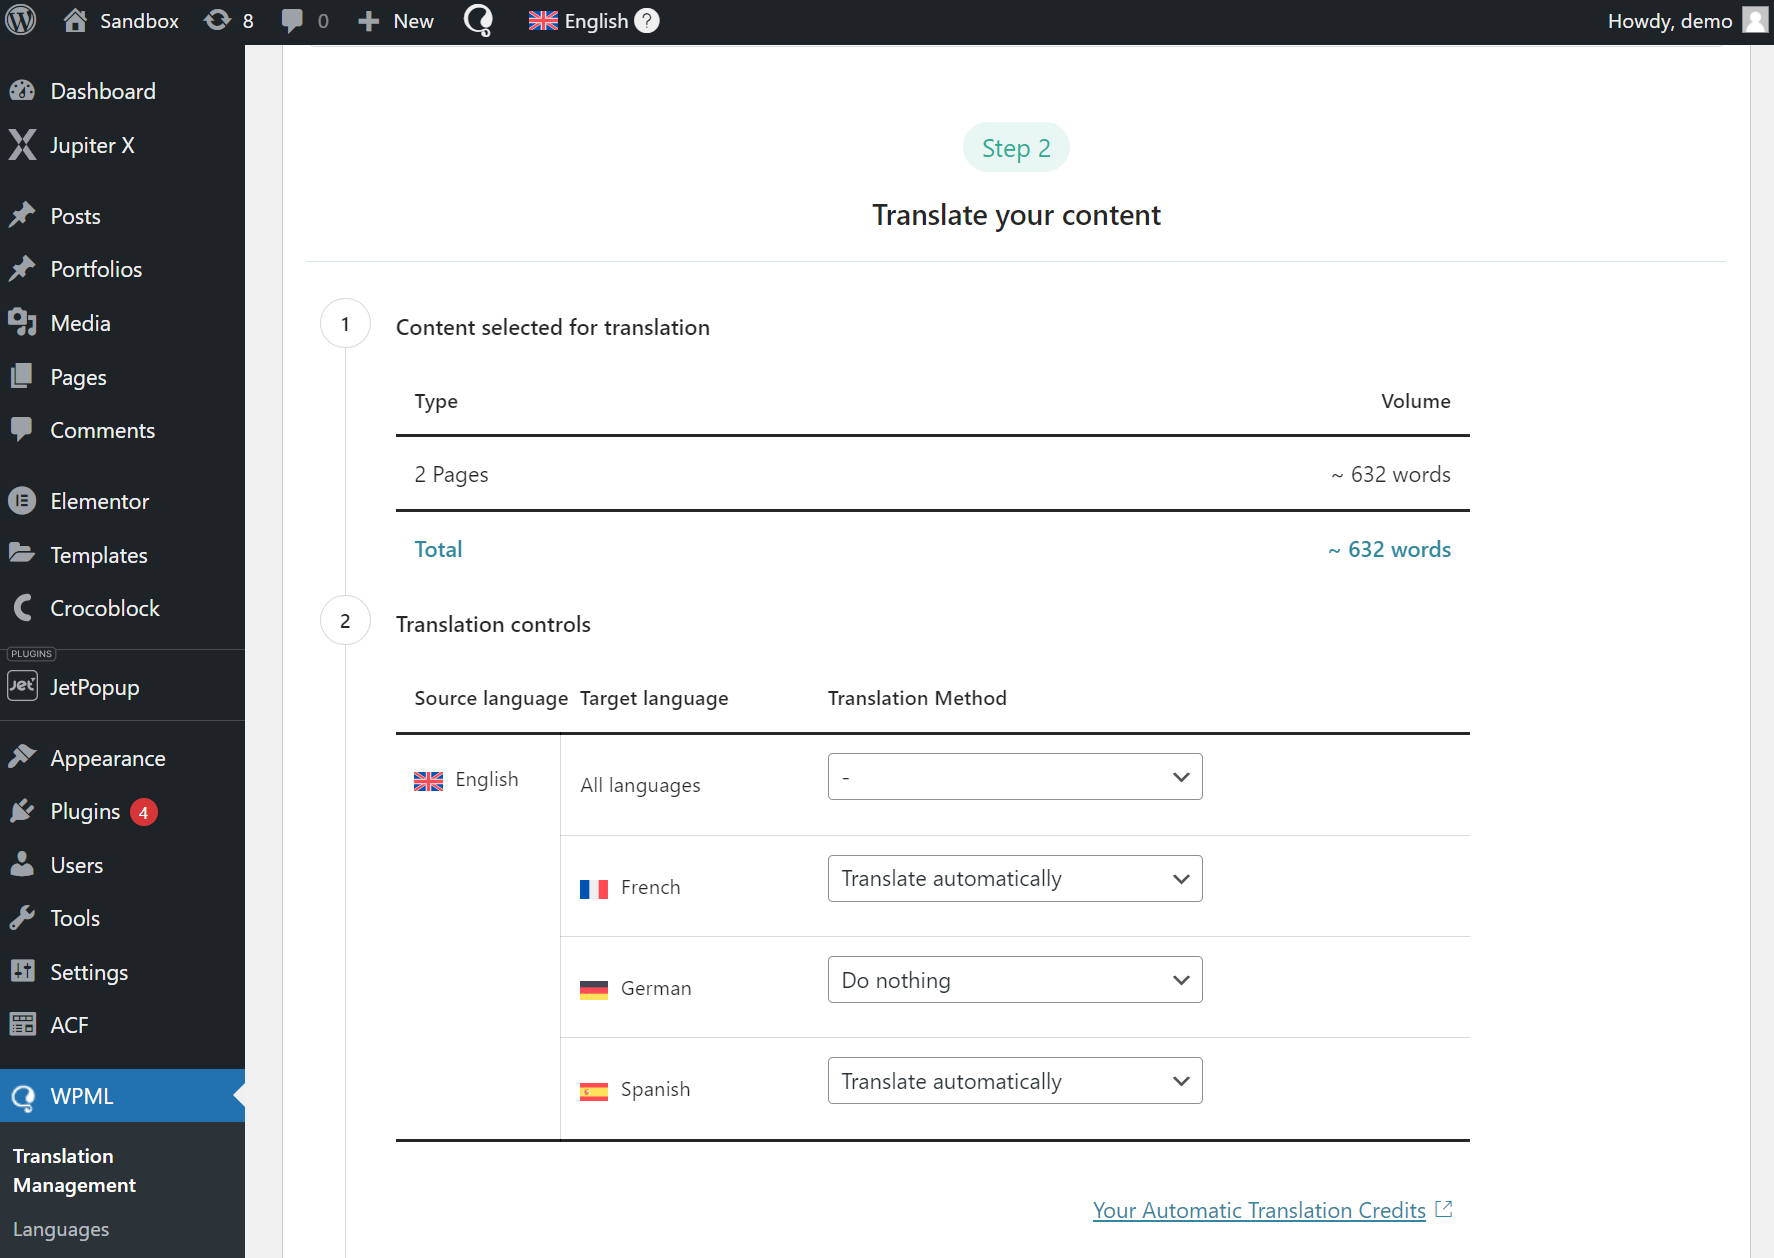
3. Translate your content with WPML
To translate content with WPML, go to WPML → Translation Management. From here, you can select what content to translate and into which languages. This includes your pages, posts, custom posts, templates, and other content from your theme and plugins.
Next, choose which languages to translate into and your translation method. For the best translation quality, it’s recommended to translate automatically with WPML AI – WPML’s most powerful translation engine, powered by ChatGPT.
If you prefer a different translation engine, WPML also supports Google Translate, DeepL, and Microsoft Translator. And, if you don’t want to translate automatically, you can also translate yourself manually, with your team of translators, or with translation services.
4. Review and publish translations
Before publishing translations on your site, WPML lets you review them and make changes. To start a review, go to WPML → Translations and click Review.
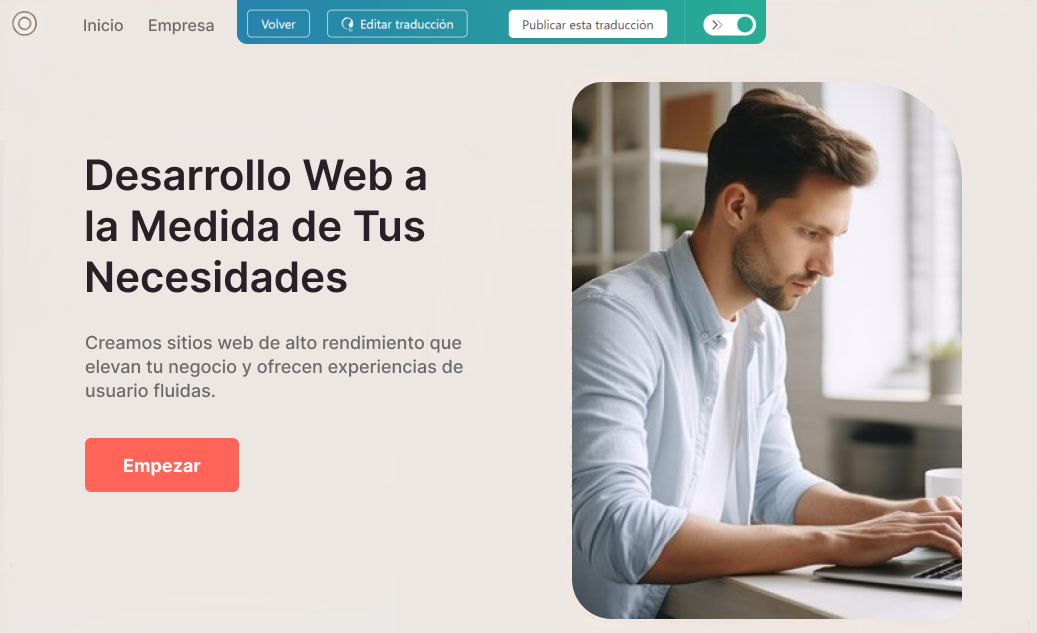
This will open the front-end editor, where you can preview translations as they appear on your website before going live for the visitors.
If you’re satisfied with your translations, click the Accept this translationbutton to publish them. If you want to make changes, click the Edit translationbutton.
This will open the Advanced Translation Editor, where you can edit translations and make necessary changes.
Once you’re satisfied with your new translations, click the Complete Translationbutton to publish them to your website. Your translations will now appear on your site when switching languages.
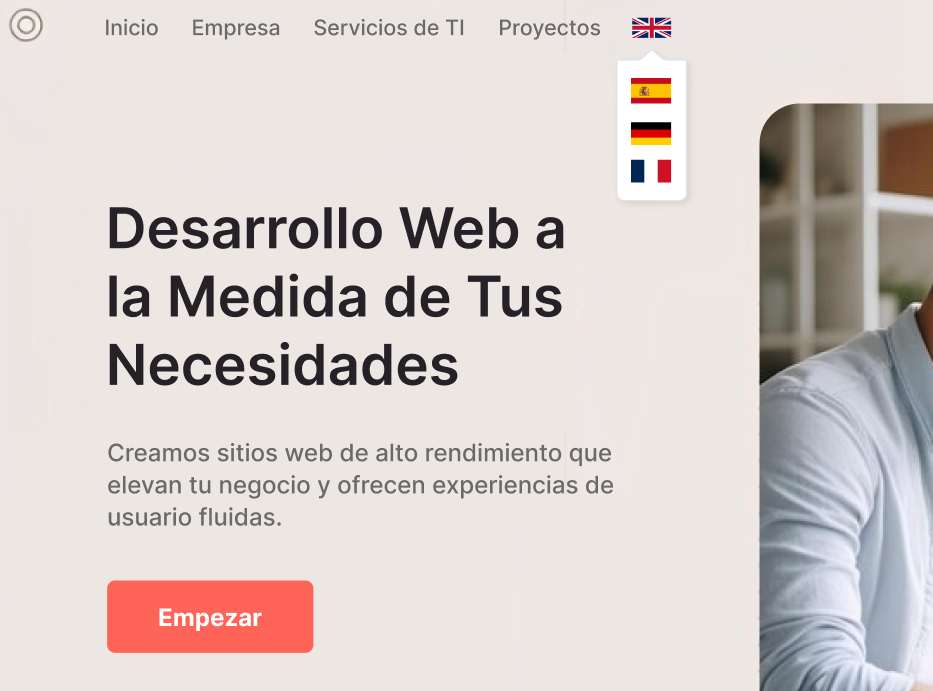
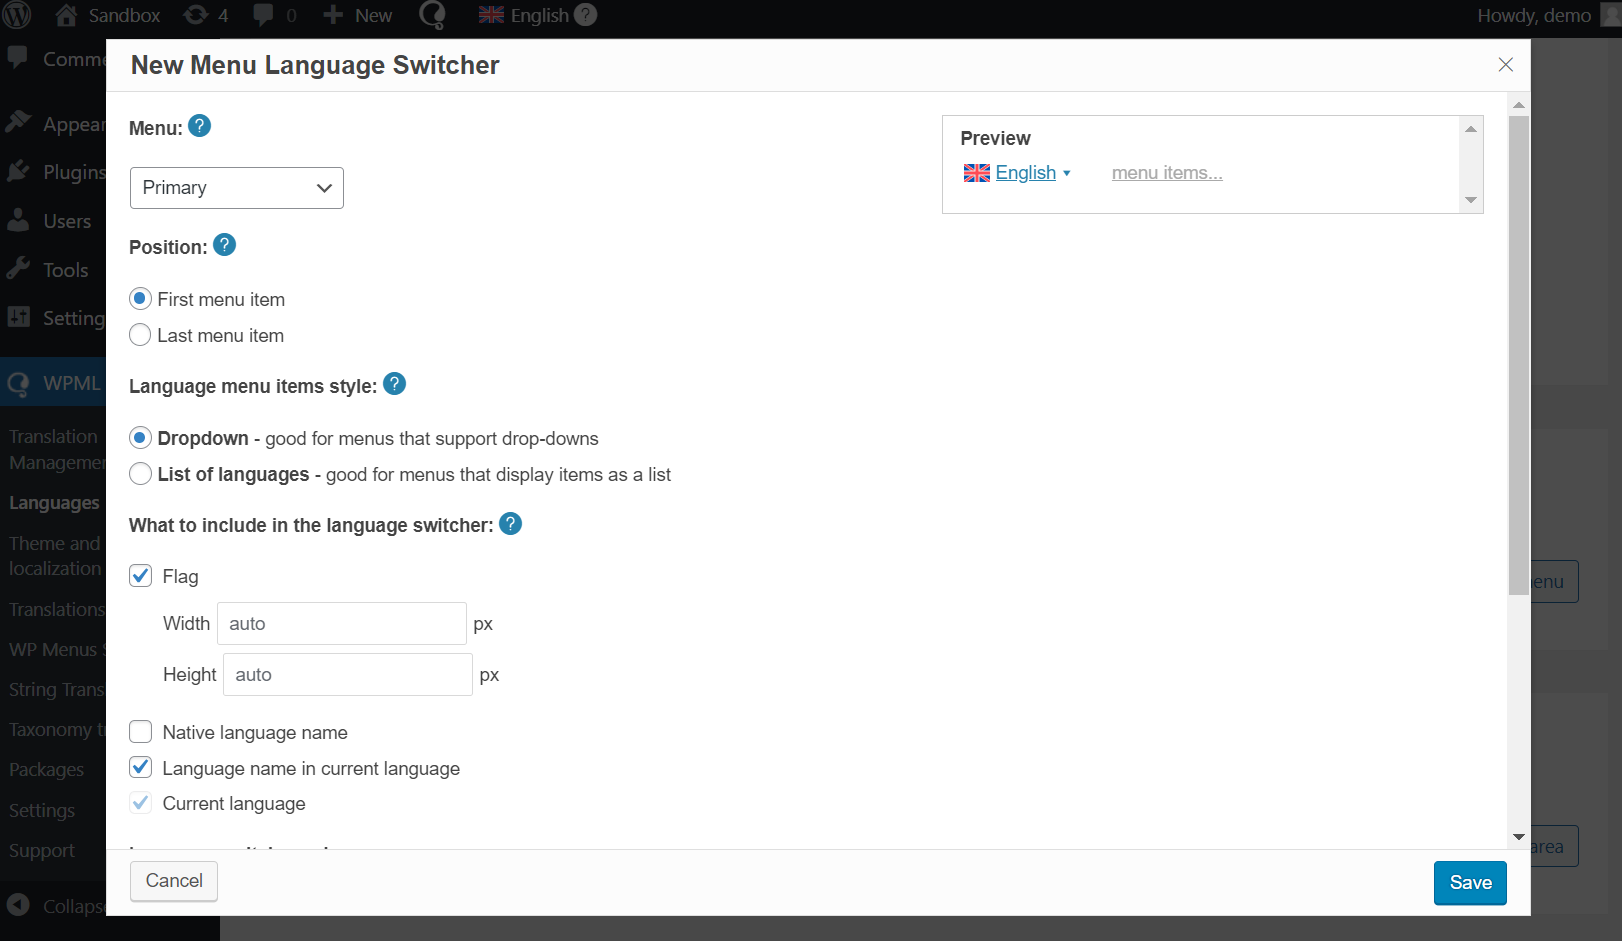
5. Add a language switcher
By default, WPML adds a language switcher to your website’s footer. However, you can add your own customized language switcher to any location on your site. This includes menus, templates, and even posts.
To add a new language switcher, go to WPML → Languages and click the " Add a new language switcher button. Customize your language switcher and click Save.
How to Make a Multilingual WordPress Site Using the Polylang Plugin
Polylang is another popular choice among WordPress multilingual plugins due to its robust features. Like Weglot, Polylang offers a free version that includes useful core features for translating different types of content, including custom post types and RTL scripts.
What makes this plugin worth using is its compatibility with Yoast SEO, which enhances your efforts to rank in your targeted countries.
The following tutorial is applicable even if you’re using the free plugin. If you wish to access premium features, consider upgrading to Polylang Pro for €99/year.
1. Set Up the Plugin
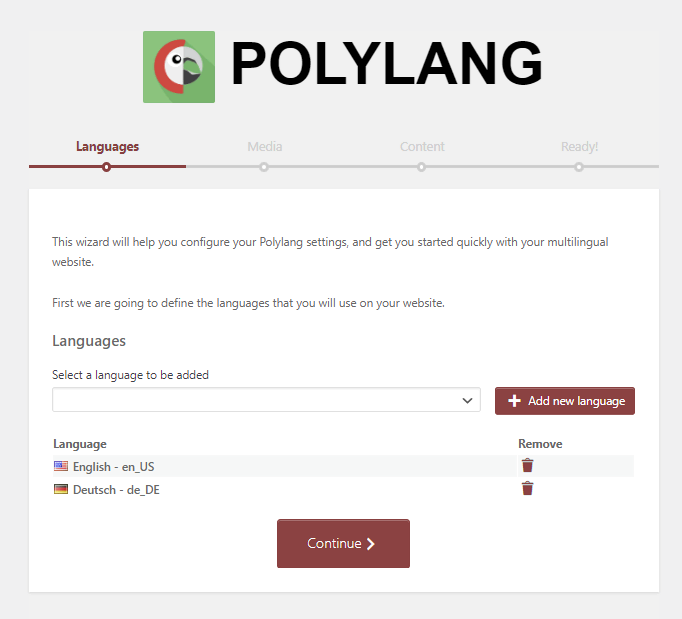
Setting up Polylang requires installing and activating the plugin. After that, follow these steps to configure the setup wizard:
Pick a language to add to your website from the dropdown field and select Add new language. Feel free to add multiple languages as desired, including the default one your website uses, then hit Continue.
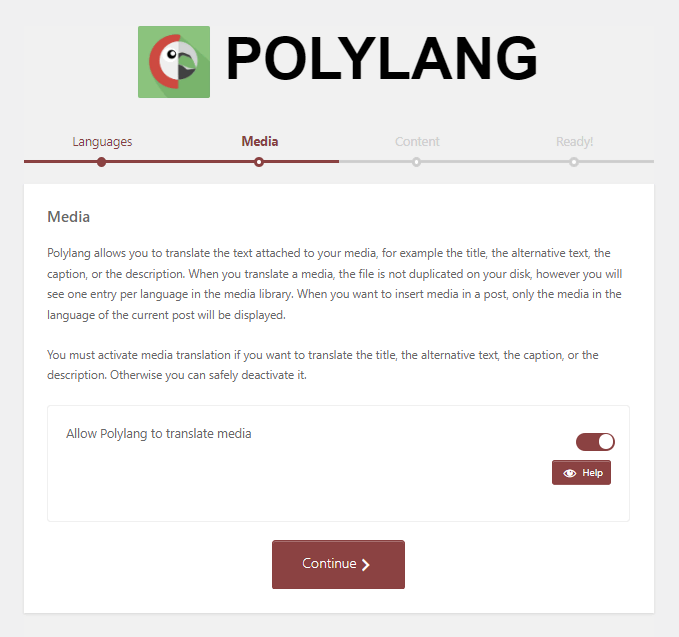
The Media step lets you configure Polylang to translate strings attached to your media files, such as titles and alternative text. Toggle this mode to enable this feature and select Continue.
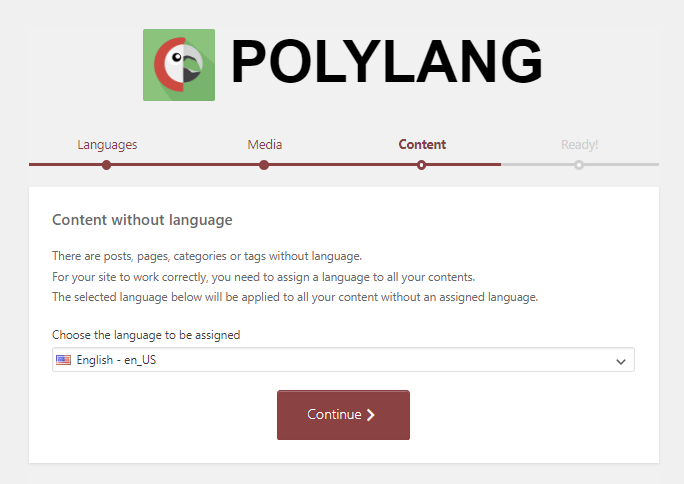
The Content step sets the default language for your website. Pick the language from the dropdown field and hit Continue.
The setup wizard is now complete. Select Return to the Dashboard to go back to the WordPress admin interface.
If your website runs on Polylang Pro, you can import your string translations via Languages → Translations. The plugin supports language files in PO and XLIFF formats.
2. Translate Website Content
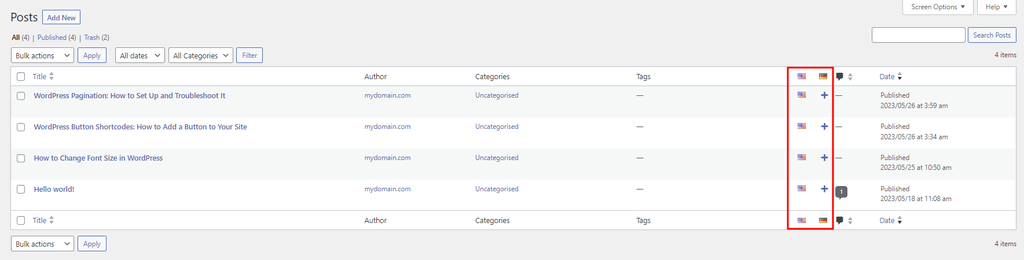
When you go to Posts → All Posts, you’ll notice a new column displaying the flags of the languages you selected earlier. Clicking the plus (+) symbol under your desired language will take you to the block editor.
There, you can start translating the content into your chosen language. Once you’re done, save and close the post.
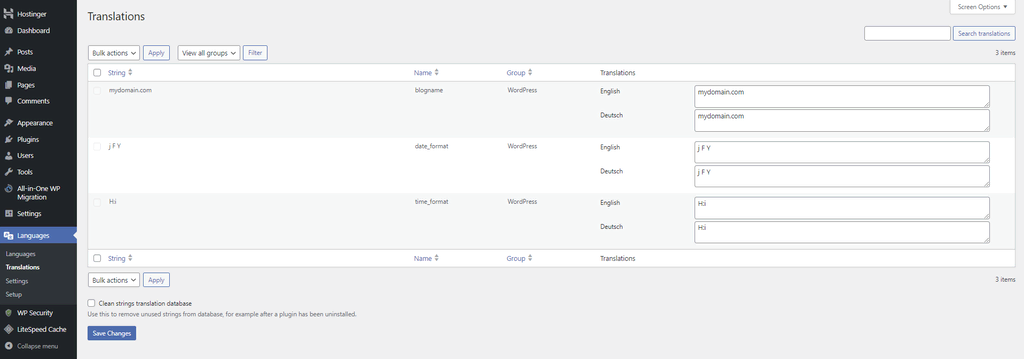
To manage the translations of strings that don’t belong to a specific page, go to Languages → Translations and make changes to the respective fields. Use the filter function to narrow your search if needed.
Polylang makes translating every part of your website possible, from posts and pages to taxonomies, slugs, and widgets. Unfortunately, it doesn’t offer automatic translation like Weglot.
If you can’t translate the website content yourself, upgrade to Polylang Pro and integrate the plugin with WPML to automate the process, or hire a professional translator.
How to Make a Multilingual WordPress Site Without a Plugin
With enough technical knowledge, you can manually create a WordPress multilingual site without additional tools like multilingual plugins. However, it requires setting up WordPress Multisite.
1. Set Up a WordPress Multisite
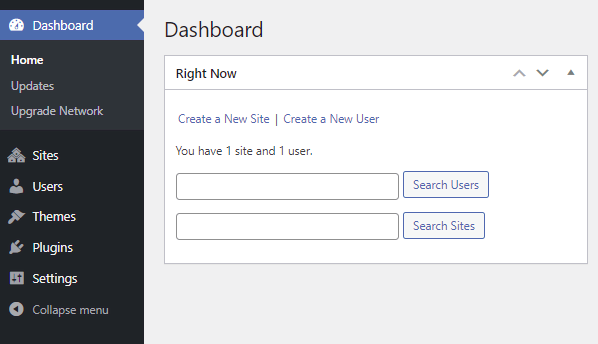
Instead of including content translation on the same website, this method creates separate sites for new languages. Once you activate Multisite on your WordPress installation, go to Network Admin → Dashboard.
Select Sites on the sidebar and hit Create a New Site. This new subsite will showcase your content in a different language entirely.
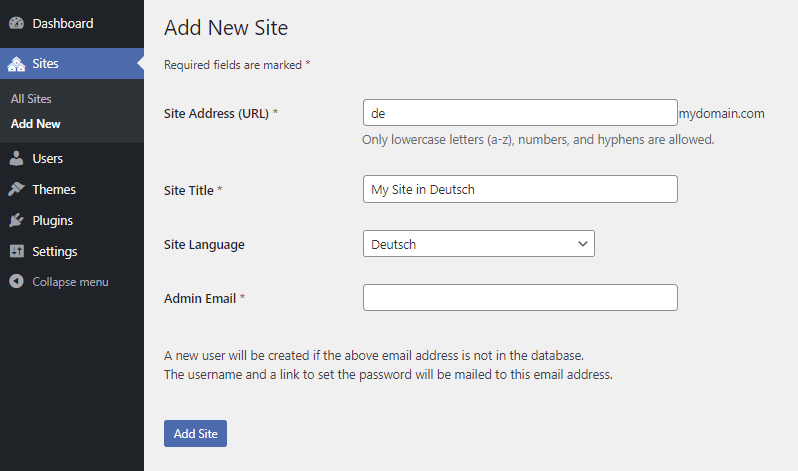
Fill out the details for your new site. We recommend using the language code for the site URL to make it easy to identify. In this example, we use de for the German site’s URL.
Hit the Add Site button once you’re done. A new entry will appear on the Sites list. Repeat this process for other languages of your choice.
2. Add Content to the Translated Sites
After setting up all the subsites, you can start filling them with translations of your original website content.
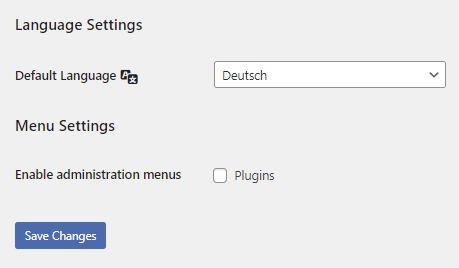
First, change the subsite’s front-end and back-end language by navigating to Settings → Network Settings from your dashboard.
Find the Default Language field under the Language Settings section and pick the new language from the dropdown menu. Then, hit Save Changes.
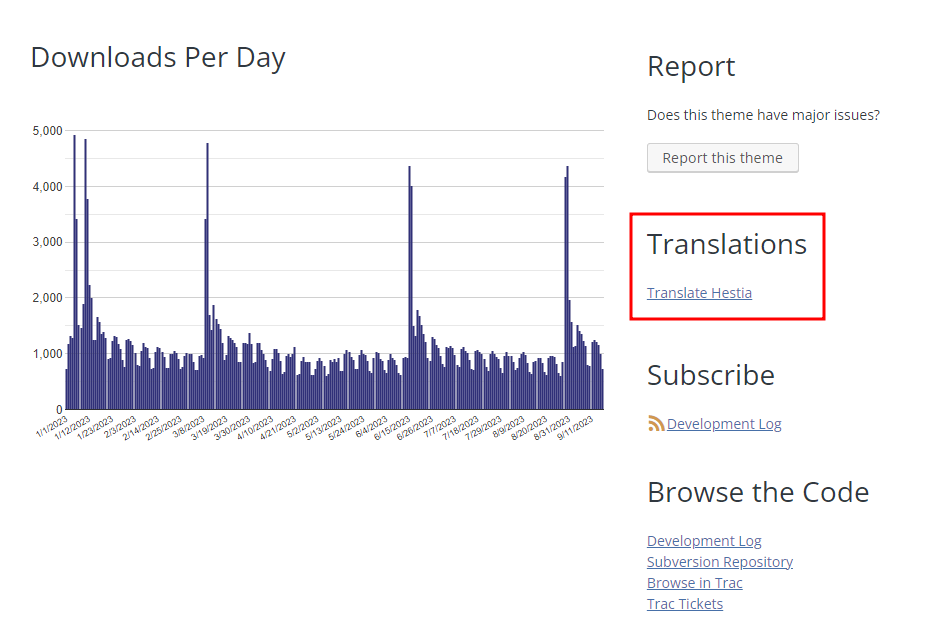
Most themes listed on the WordPress directory are ready for multilingual sites. Click on the Translate theme_name link in the sidebar of the theme’s WordPress page to see all the supported languages.
If the theme supports your chosen language, WordPress will automatically request the language file that fits the subsite’s default language. The same goes for WordPress plugins.
As for website content like posts and pages, if you prefer not to use a multilingual plugin, your only choice is to create each of them manually. While online translation services like Google Translate can streamline the localization process, you’ll still need to upload the text manually.
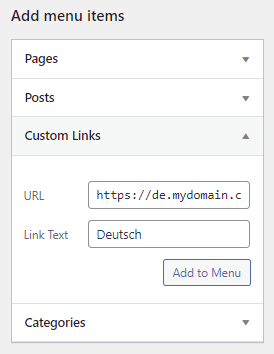
3. Add Links to the Translated Sites
The final step is to enable language switching for site visitors. One way to do this is by adding custom links to the translated sites on the default language homepage.
Open your main site’s dashboard and go to Appearance → Menus. Click on the Custom Links tab under the Add menu items section and add the URL to your subsite along with the navigation label for the link. After that, hit Add to Menu.
That’s it – your multilingual WordPress site is ready to go live.
What Website Content Should You Translate
If you don’t know where to start translating, here are the four key site elements to prioritize for a user-friendly multilingual WordPress website.
Text Content
A good WordPress multi-language site should have its essential content, like blog posts, menus, product descriptions, and the About Us page translated. Focus on all visible text and double-check whether the formatting, units, and currencies match the target language.
Most importantly, ensure that the cultural context of the translated content aligns with your intent and target audience. As a literal translation alone may not suffice, consider using translation tools and seeking assistance from professional translators or native speakers for optimal results.
SEO Metadata
SEO metadata includes your content’s meta title and description. The meta title is an HTML tag representing the article on search engines, while the meta description summarizes the content to encourage clicks from users.
Not providing the translated version of these elements can lead to significant traffic loss. Users might assume your content lacks their language option and won’t click on your website in the search results.
While adding SEO metadata manually in WordPress is possible, we recommend using a plugin to make it easier. Yoast SEO and All in One SEO are among the best WordPress SEO plugins available.
Images
Alt text, also known as alt description, enhances visual accessibility for screen-reader users and aids search engines in better understanding your web pages. Translating alt text benefits your website’s overall user experience and search engine optimization.
To take it a step further, consider localizing your images’ file names to the same language as the rest of your content. For example, an image called flower.png in English should be translated to blume.png in the German version of the page.
URLs
Multilingual websites must also translate URLs or slugs to match the target localization’s languages. Since these slugs typically contain keywords for the content, localizing them can boost your traffic and local SEO efforts.
Pro Tip
Take special care when translating URLs to languages like Japanese or Arabic. Non-Latin alphabets and special characters might cause issues with some third-party tools like plugins.
Advantages of Multilingual WordPress Site
Besides enabling more visitors to use your site, here are four other benefits of having a WordPress multi-language website:
Improve SEO
Search engine optimization is vital in improving your site’s visibility, and having a multilingual WordPress website can enhance it. When you translate pages into different languages, search engines may treat the translated versions as separate pieces of content.
This practice is called multilingual SEO, where a single piece of content can appear on various search engine results pages (SERPs), potentially generating more clicks. Publishing multilingual posts also contributes to multiregional SEO, which involves adapting content elements to specific geographic areas.
Besides the content language, multilingual SEO addresses back-end elements like URL structure and hreflang tags.
Enhance User Experience
Offering your website in multiple languages improves navigation for a wider audience. Language is a crucial aspect of UX design, enabling users to comprehend text and interact with visual elements effectively.
To ensure your website can handle the increased traffic from translated pages, consider switching to Hostinger’s managed WordPress hosting plans for top-notch performance. Our global servers are ideal for multilingual websites serving an international audience.
Create Trust and Credibility
A multilingual WordPress site fosters trust and credibility with potential customers. Given that 72% of shoppers prefer websites in their native language, having a multilingual site can turn one-time buyers into loyal customers.
This is especially crucial for businesses targeting non-English speaking audiences, as 87% of buyers won’t make purchases from English-only websites.
Boost Conversions
The primary aim of most marketing efforts, whether you’re selling products or monetizing content, is to boost conversions.
Offering multiple languages on your site helps potential customers fully understand your content and feel confident about your product. Communicating in their native language makes guiding visitors to crucial pages easier.
A multilingual site also fosters inclusivity and personalization. As 60% of customers are likely to become repeat buyers after a personalized shopping experience, addressing user needs in their language can significantly enhance your brand image.
Final thoughts
WordPress multilingual sites offer numerous benefits for reaching a broader audience and improving the user experience. If built properly, they can strengthen your brand’s credibility and boost conversions in the long run.
This article provided step-by-step guidance on creating a multilingual WordPress website using two different methods. The easiest approach is leveraging multilingual plugins with a visual translation editor like WPML, Weglot, and Polylang, which simplify the process and offer useful features.
It’s also possible to create a multilingual WordPress site without third-party tools. However, this method requires technical knowledge to manually modify WordPress back-end files. We hope this article has assisted you in creating a multilingual WordPress site using your preferred method. Good luck!
Frequently Asked Questions
WordPress doesn’t have built-in multilingual support by default. However, many multilingual plugins offer machine translation tools that can help localize your content instantly. Most themes today also come with a language pack to accommodate multilingual sites.
I work at the point where product decisions, system architecture, and engineering execution meet. At Mediusware, I’m accountable for how technology choices affect reliability, scale, and long-term delivery for our clients.